

When it comes to securing your doors and enhancing the aesthetic appeal of your spaces, zinc alloy handle locks are an excellent choice. As a trusted zinc alloy handle lock supplier, I understand the importance of proper installation to ensure the functionality and longevity of these locks. In this blog, we will delve into the installation requirements for zinc alloy handle locks, providing you with valuable insights to make your installation process smooth and successful.
1. Understanding the Basics of Zinc Alloy Handle Locks
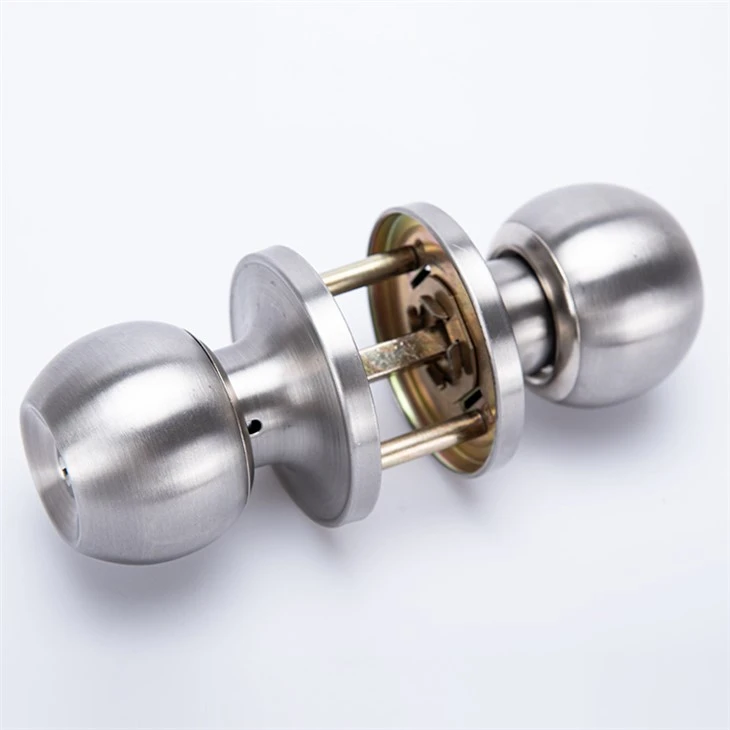
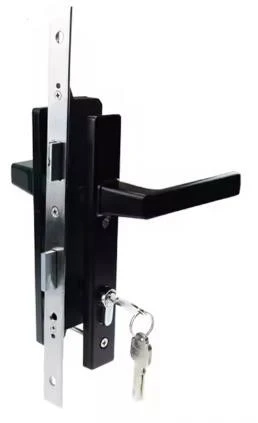
Zinc alloy handle locks are known for their durability, corrosion resistance, and attractive appearance. They come in various styles and designs, such as Ball Shaped Handle Lock, Split Handle Lock, and T Handle Cam Latch, to meet different needs and preferences. Before starting the installation, it is essential to familiarize yourself with the specific type of lock you have and its components.
2. Tools and Materials Required
To install a zinc alloy handle lock, you will need the following tools and materials:
- Screwdriver: A Phillips or flathead screwdriver, depending on the type of screws used in the lock.
- Drill: A power drill with appropriate drill bits for making holes in the door.
- Measuring Tape: To ensure accurate measurements for drilling holes and aligning the lock components.
- Pencil: For marking the drilling points on the door.
- Lock Set: The zinc alloy handle lock set, which typically includes the handle, lock mechanism, strike plate, and screws.
3. Pre-Installation Preparation
Before installing the lock, follow these steps to prepare the door:
- Measure the Door: Use a measuring tape to determine the thickness of the door. Most zinc alloy handle locks are designed to fit standard door thicknesses, but it is crucial to confirm this to ensure a proper fit.
- Mark the Installation Points: Place the lock on the door and mark the positions for the holes using a pencil. Make sure to align the lock properly with the door edge and the strike plate location on the door frame.
- Check the Door Frame: Ensure that the door frame is in good condition and free from any damage or warping. A damaged door frame can affect the installation and performance of the lock.
4. Drilling the Holes
Once you have marked the installation points, it's time to drill the holes for the lock components. Follow these guidelines:
- Use the Correct Drill Bit: Select a drill bit that is the appropriate size for the screws provided with the lock. Using the wrong drill bit can result in loose or damaged screws.
- Drill at the Right Angle: Drill the holes perpendicular to the door surface to ensure a proper fit for the lock components.
- Drill Slowly and Carefully: Take your time to drill the holes, especially when drilling through the door edge. This will prevent the wood from splintering and ensure a clean and precise hole.
5. Installing the Lock Components
After drilling the holes, it's time to install the lock components:
- Install the Handle: Insert the handle through the hole on the outside of the door and secure it with the screws provided. Make sure the handle is tightly attached and rotates smoothly.
- Install the Lock Mechanism: Insert the lock mechanism into the hole on the inside of the door and align it with the handle. Secure the lock mechanism with the screws provided.
- Install the Strike Plate: Place the strike plate on the door frame at the marked location and secure it with the screws provided. Make sure the strike plate is aligned with the lock mechanism for proper locking and unlocking.
6. Testing the Lock
Once the lock components are installed, it's important to test the lock to ensure it is functioning properly. Follow these steps:
- Insert the Key: Insert the key into the lock and turn it to lock and unlock the door. Make sure the lock operates smoothly and without any resistance.
- Check the Alignment: Check the alignment of the lock and the strike plate to ensure that the bolt engages properly when the door is closed.
- Test the Handle: Test the handle to ensure it rotates smoothly and that the lock can be operated from both the inside and outside of the door.
7. Additional Considerations
- Weather Resistance: If the lock will be installed on an exterior door, consider choosing a zinc alloy handle lock with weather-resistant features to prevent corrosion and damage from the elements.
- Security Features: Some zinc alloy handle locks come with additional security features, such as deadbolts or anti-pick mechanisms. Consider these features to enhance the security of your doors.
- Maintenance: Regularly clean and lubricate the lock to ensure its smooth operation and longevity. Use a mild cleaner and a lubricant recommended by the lock manufacturer.
Conclusion
Proper installation is crucial for the functionality and longevity of zinc alloy handle locks. By following the installation requirements outlined in this blog, you can ensure a successful installation and enjoy the benefits of a secure and stylish lock. If you have any questions or need further assistance with the installation process, please feel free to contact us. We are a leading zinc alloy handle lock supplier, and we are committed to providing high-quality products and excellent customer service. Contact us today to discuss your lock requirements and start your procurement process.
References
- Manufacturer's installation instructions for zinc alloy handle locks.
- Industry standards and best practices for door lock installation.