

Hey there! If you're looking to enhance the security of your home or office, installing a keypad door handle lock is a great idea. As a door handle lock supplier, I've helped many customers with this process, and I'm here to share my knowledge with you. In this blog post, I'll walk you through the steps of installing a keypad door handle lock, from choosing the right lock to completing the installation.
Step 1: Choose the Right Keypad Door Handle Lock
The first step in installing a keypad door handle lock is to choose the right one for your needs. There are several factors to consider when making this decision, including the type of door you have, the level of security you need, and your budget.
- Type of Door: Keypad door handle locks are available for a variety of door types, including wooden doors, metal doors, and fiberglass doors. Make sure to choose a lock that is compatible with your door.
- Level of Security: Keypad door handle locks come with different levels of security features, such as multiple user codes, auto-locking, and anti-pick technology. Consider your security needs and choose a lock that provides the level of protection you require.
- Budget: Keypad door handle locks can range in price from affordable to high-end. Set a budget and choose a lock that fits within your price range.
At our company, we offer a wide range of Door Handle With Lock Set to suit different needs and budgets. Whether you're looking for a basic lock for your home or a high-security lock for your office, we have the right product for you.
Step 2: Gather the Necessary Tools
Before you start the installation process, you'll need to gather the necessary tools. Here's a list of tools you'll typically need:
- Screwdriver set
- Drill
- Measuring tape
- Pencil
- Allen wrench
Make sure you have all the tools on hand before you begin the installation to avoid any delays.
Step 3: Prepare the Door
Once you have the right lock and the necessary tools, it's time to prepare the door for installation. Here's what you need to do:
- Remove the Old Lock: Use a screwdriver to remove the screws holding the old lock in place. Carefully remove the old lock from the door.
- Clean the Door: Use a clean cloth to wipe down the area where the new lock will be installed. This will ensure a smooth and secure installation.
- Measure the Door: Use a measuring tape to measure the dimensions of the door. This will help you determine the correct placement for the new lock.
Step 4: Install the Keypad
Now it's time to install the keypad on the outside of the door. Here's how you do it:
- Mark the Placement: Use a pencil to mark the placement of the keypad on the outside of the door. Make sure the keypad is centered and level.
- Drill the Holes: Use a drill to drill the holes for the keypad screws. Make sure the holes are the correct size for the screws.
- Attach the Keypad: Insert the screws through the holes in the keypad and into the door. Use a screwdriver to tighten the screws until the keypad is securely attached to the door.
Step 5: Install the Interior Handle
Next, you'll need to install the interior handle on the inside of the door. Here's what you need to do:

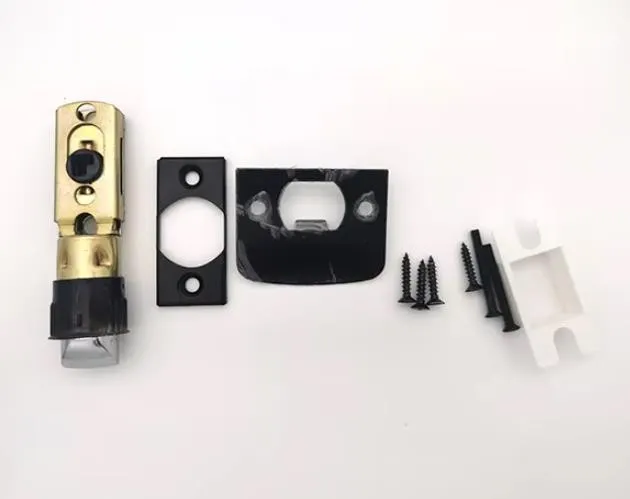
- Insert the Latch: Insert the latch into the hole in the door frame. Make sure the latch is properly aligned with the strike plate on the door jamb.
- Attach the Interior Handle: Insert the screws through the holes in the interior handle and into the door. Use a screwdriver to tighten the screws until the interior handle is securely attached to the door.
Step 6: Connect the Wires
If your keypad door handle lock is electronic, you'll need to connect the wires. Here's how you do it:
- Identify the Wires: Refer to the installation instructions to identify the wires and their corresponding connections.
- Connect the Wires: Use wire connectors to connect the wires according to the instructions. Make sure the connections are secure.
Step 7: Program the Keypad
Once the lock is installed and the wires are connected, it's time to program the keypad. Here's what you need to do:
- Enter the Master Code: Follow the instructions to enter the master code for the lock. This code will allow you to manage the user codes and other settings.
- Add User Codes: You can add user codes for family members, friends, or employees. Each user code should be unique and easy to remember.
- Test the Lock: Test the lock by entering a user code and trying to open the door. Make sure the lock unlocks and locks properly.
Step 8: Install a Key Storage Box (Optional)
If you want to have a backup key in case of emergencies, you can install a Key Storage Box near the door. This box can be used to store a spare key in a secure location.
Step 9: Final Checks
Once the installation is complete, it's important to perform some final checks to ensure everything is working properly. Here's what you need to do:
- Test the Lock: Test the lock multiple times to make sure it unlocks and locks smoothly. Try different user codes to ensure they all work.
- Check the Alignment: Make sure the door closes and latches properly. Check the alignment of the lock and the strike plate to ensure a tight fit.
- Clean Up: Clean up any tools and debris from the installation area.
Conclusion
Installing a keypad door handle lock is a great way to enhance the security of your home or office. By following these steps, you can install a lock quickly and easily. If you have any questions or need further assistance, don't hesitate to contact us. We're a leading door handle lock supplier, and we're here to help you find the right lock for your needs and ensure a successful installation.
Whether you're a homeowner looking to upgrade your security or a business owner in need of high-quality locks, we have the products and expertise to meet your requirements. Contact us today to discuss your needs and start the process of upgrading your door locks.
References
- Manufacturer's installation instructions for keypad door handle locks.
- General knowledge and experience in the door handle lock industry.